Before You Start
- Inspect your new muffler package to be sure all parts are included in the muffler carton.
- Tools required: 1/2" and 9/16" open end wrench or socket set; a rust solvent; hacksaw (most installations); hammer; wire brush or emery cloth; cold chisel; set of pliers.
- Review all instruction steps prior to removing the worn muffler.
Muffler Removal
- For your protection, always wear safety glasses. In addition, if it is necessary to raise the vehicle prior to removal of the muffler, make sure the load is properly supported. (Do not support vehicle with a bumper jack only). If only one end of the vehicle is raised, block tires to prevent rolling.
- Inspect the entire exhause system for other worn parts. It's a good idea to replace worn-out pipes and hangers at the same time as the muffler. (Look for holes, excessive rust).

- Loosen tail pipe hanger(s) if applicable.
Use one of the following procedures to remove the muffler:
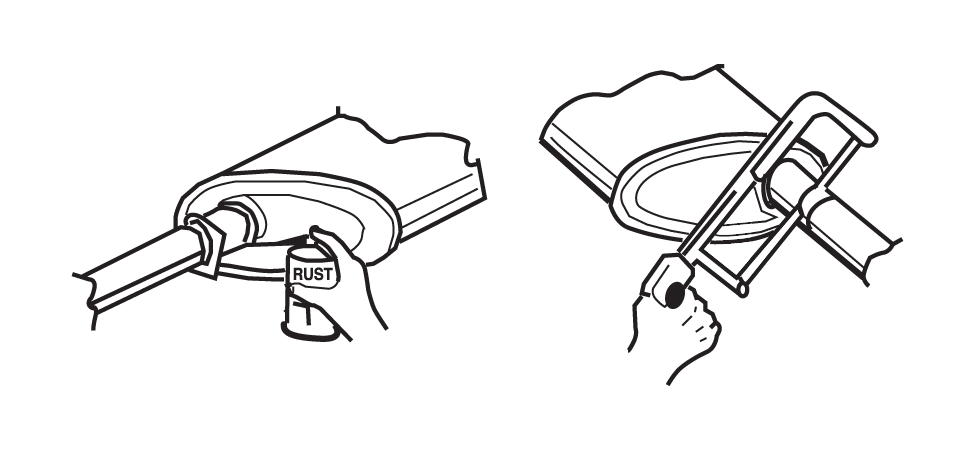
- On some vehicles, the old muffler is welded to the exhaust pipe. Using a hacksaw, cut exhaust pipe off as close to the muffler weld as possible. In some welded assembly applications, both the exhaust pipe and muffler must be replaced.
- If the old muffler is welded to the tail pipe, using a hacksaw, cut tail pipe off as close to the muffler weld as possible. Then, loosen the clamp at muffler to exhaust pipe connection to remove muffler. The removal of the muffler from the exhaust pipe may be difficult. Two methods may be utilized. Rust solvent applied to the muffler inlet bushing may help, or a cold chisel may be needed to split or peel back the inlet muffler bushing to remove from exhaust pipe. In both instances, be careful not to damage the exhaust pipe.
- If all connections are clamped, simply take off the old clamps and worn-out pipes. Rust solvent is usually all that's needed, but again a cold chisel may be necessary to split the muffler bushings.
- If the tail pipe fits over the muffler outlet bushing, loosen the clamp and rotate muffler to remove. Rust solvent may be applied to ease in rotation of muffler. The outlet muffler bushing may be stuck inside the tail pipe. If this is the case, cut off the bushing at the point where it meets the tail pipe, and remove the bushing stub from the tail pipe with a cold chisel or set of pliers.
Muffler Installation
- Before installing your new muffler, be sure all pipes are free or burrs, clean off the corrosion and scale by using the wire brush or emery cloth.
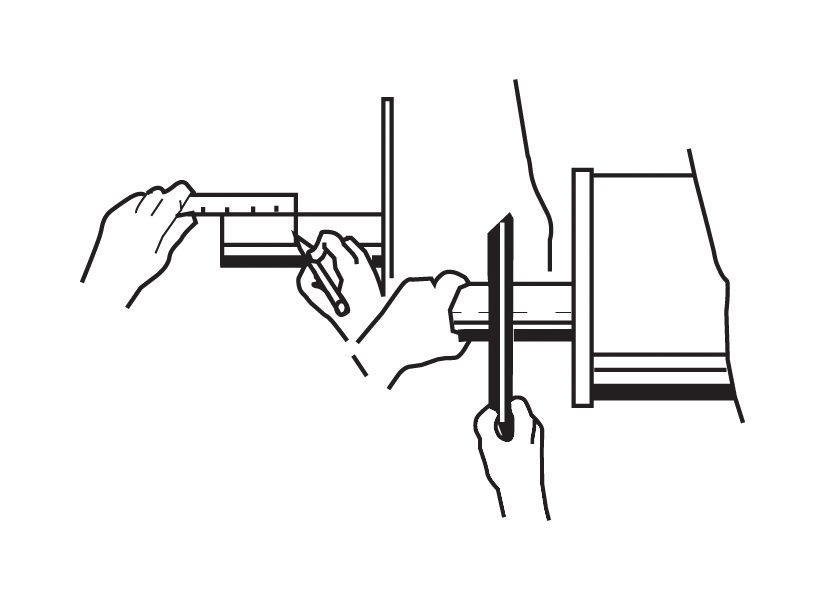
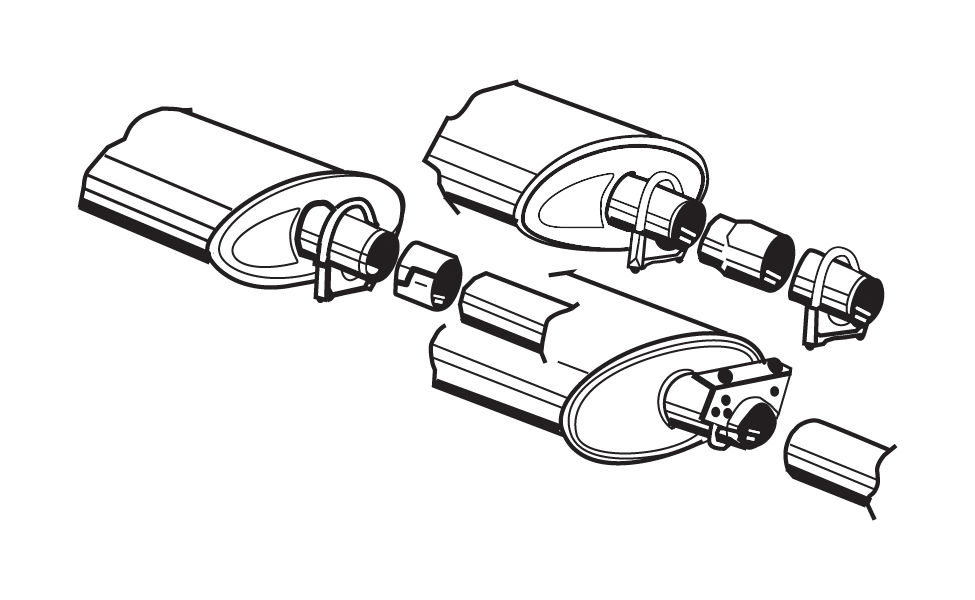
- Locate inlet end of muffler for your vehicle application by referencing orientation of the muffler removed. Preassemble adapter, bracket, or insert(s) as indicated for your application. Finger tighten only the clamps just enough to hold these accessory parts in place on the muffler.

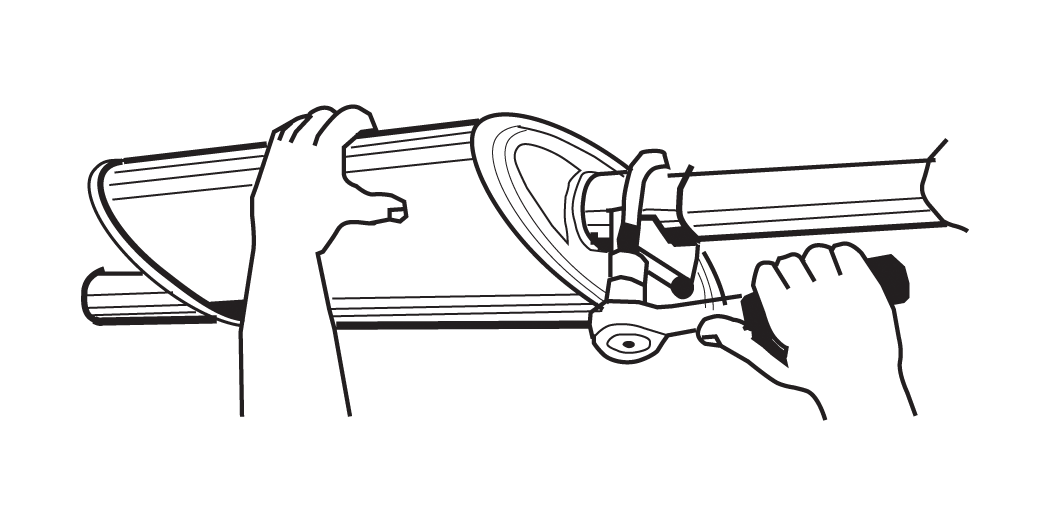
- Connect the muffler inlet to the exhaust pipe. The pipe should go 1 1/2" - 2" into the muffler inlet. Rotate the muffler and pipe to insure proper alignment. Clamp snuggly.

- Assemble the tail pipe to the muffler and clamp snuggly.
- The complete exhaust system is now loosely installed. Check for proper clearance and alignment. Make sure the pipes and muffler have adequate clearance at the frame, body, rear axle, springs, shocks, gas tank, steering mechanism or any other part of the undercarriage.
- Tighten any remaining clamps, hangers and brackets securely. Start at the front of the car and work toward the rear.

- Start engine and run it in neutral. Accelerate and decelerate the engine. Listen for noise or rattles. To test for any possible exhaust leaks, use a heavy cloth rag to plug the end of the tail pipe. Upon completion of the test, remove the rag. Road test the vehicle and listen for exhaust system rattles. Correct as needed for proper clearance.
Download This Webpage As a PDF


